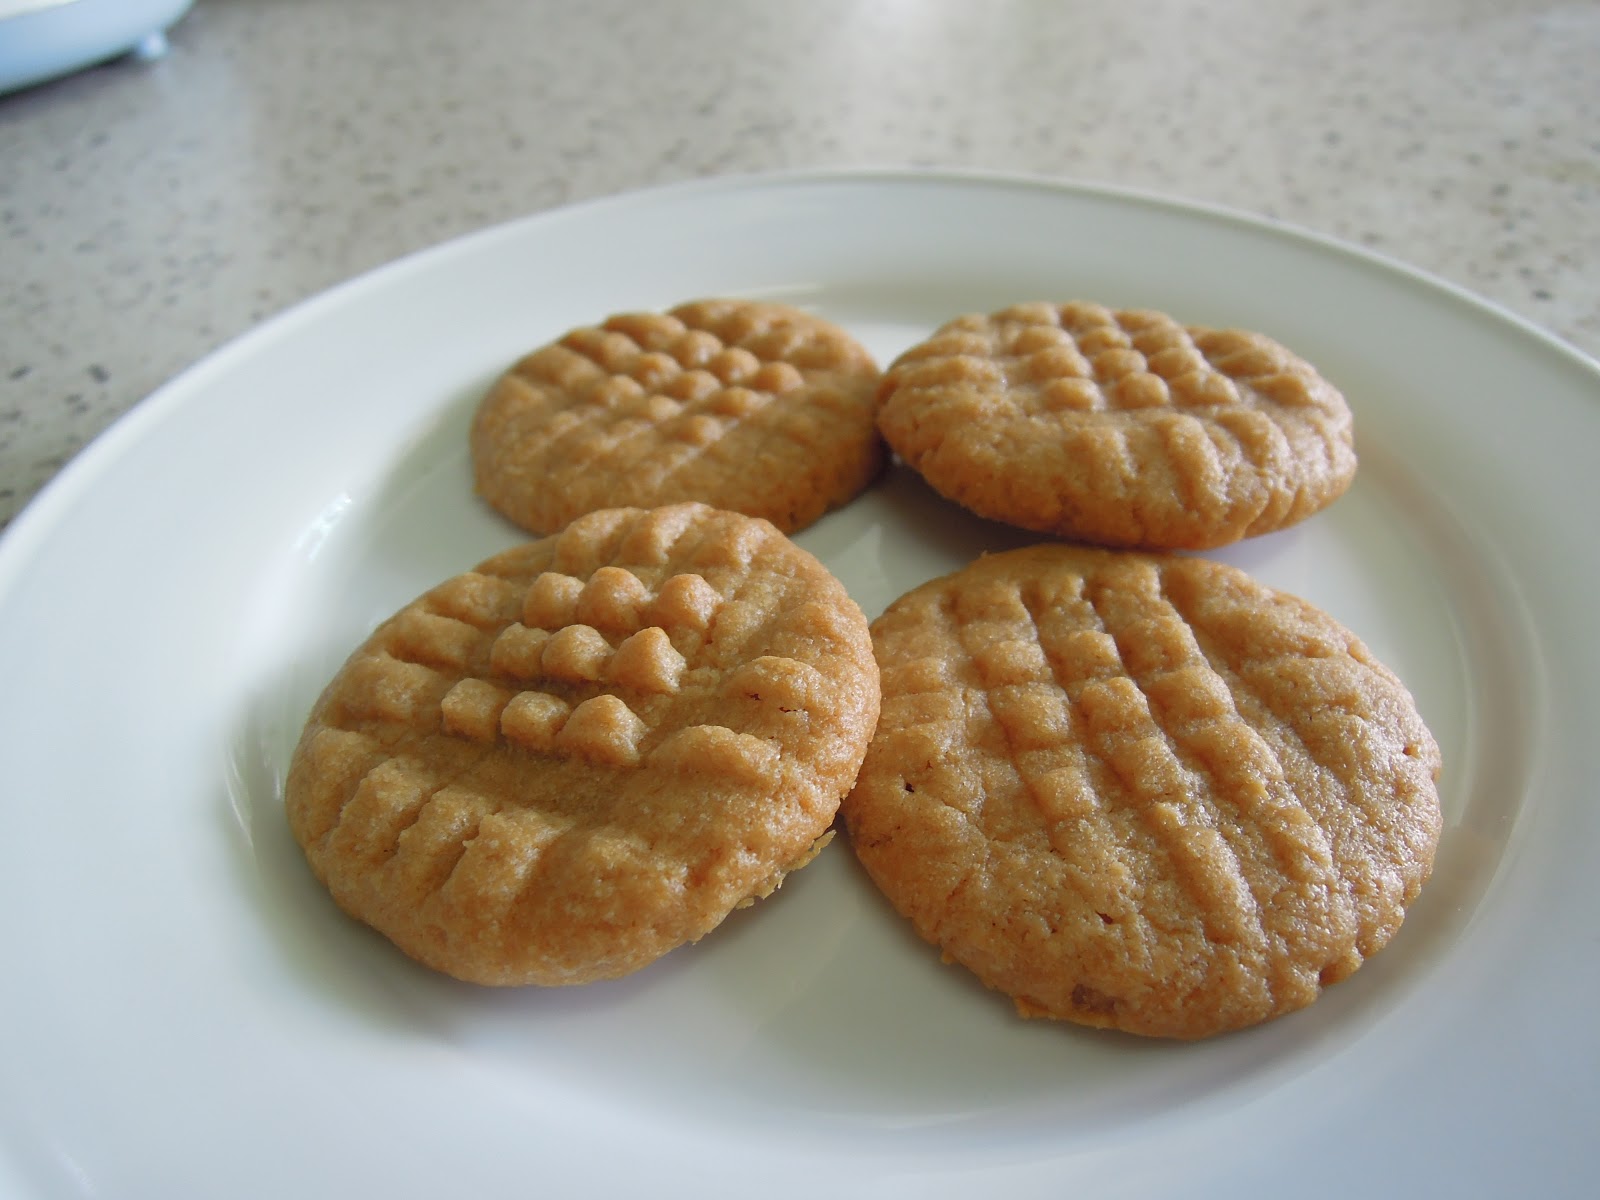
Wednesday 21 November 2012

Simplest Peanut butter cookies EVER!


Peanuts?? butter?? Who doesn't like like those??? oh and ...peanut butter??I like it even more! Who would have thought that these cookies would be sooo simple. I was surfing the net when i came across this recipe...I thought...what the heck...3 ingredients?? Who could go wrong with just 3 ingredients? Well nothing went wrong except my calorie count....it went bonkers!!haywire!!

Ok..there are two versions to this recipe. One version is with baking soda and the other is without. I prefer it with baking soda...as i rather like crisp cookies rather than a soft centered one. For these lovelies...i rolled them into 1.5 inch balls and flattened them using a flat bottomed glass to make it thin..criss-crossed the top with a fork and baked mine at 170 C fan forced for 12 mins. Now thats what I call crispy! But make sure to check on them as not to let the cookies burn..each oven is different..play around with the heat to suit you.

Oh and by the way...these cookies are gluten free.which means.. (drum roll please) NO FLOUR! By the way I made these for my kids so that i could finish up some ingredients and I really don't want to go out to buy some cookies from the store that has a TON of unwanted ingredients and preservatives.

Peanut Butter Cookies
Source:Aleesha

Ingredients:
1 large egg
1 cup castor sugar (i reduced mine to 1/2 cup and it was still sweet but not tooo sweet)
1 cup peanut butter (i used skippy smooth - if you use sweet peanut butter please reduce sugar)
optional: 1 teaspoon vanilla extract, 1 teaspoon baking soda(i used less)

Instructions:
  1. preheat oven to 170 Celsius. mix all the ingredients in one bowl and mix with a wooden spoon or spatula.
  2. make 1.5 inch balls and place on the baking tray lined with parchment paper. flatten with a flat bottomed glass and make criss-crosses on the tops with a fork
  3. bake for 8-10 mins for chewy cookies..but i baked mine for 12 mins for crispy cookies as we are used to crisp cookies

Chickpea Hummus...

Chickpea Hummus 

Chickpea hummus has got to be one of the simplest snacks to stash up in your refrigerator. It can be used as a party dip...a breakfast spread..mid-morning or afternoon snack..whatever you like. Kids love them too...well at least my daughter and baby likes it..haha..my big boy stuck out his tongue saying "yuck!" but then again...he says that to most healthy snacks..LOL

Well anyways..hummus can be made with various beans like white beans, peas, chickpeas and many more. But I have only tried chickpeas so far. I love it! It can be served with tortilla chips(unflavored and plain ones are better) carrots sticks, celery sticks..any vegetable you like actually. You can serve it with flat breads..or you can even spread on bread to make a sandwich..great for tea time or snack on the go. You can make it ahead and keep in the refrigerator..but my one can of chickpeas recipe lasts only two days...i keep snacking on it...it never lasts long..boohooo! But I must advise, do use quality ingredients and you can also boil your own chickpeas instead of the canned ones.

photo from google
these are the ones I used, easily available in Malaysia..or you can boil your own


Chickpea/Garbanzo Bean Hummus
source: All Recipes (this is the basic recipe and i altered it to my liking)

Ingredients
2 cloves garlic (crushed using the pestle and mortar so it doesn't leave chunks of garlic)
1 can garbanzo beans (the original asked to save 1/2 the liquid but i think it kinda leaves a bitter taste to it..so I opted for plain water instead)
less than 1/2 cup of plain water (in place of the liquid in the garbanzo bean can)
4 tablespoons lemon juice (add one tablespoon at a time so that you can adjust to your liking)
2 tablespoons tahini
1 teaspoon salt (adjust to liking)
2 tablespoons olive oil (I may have added slightly more)
black pepper to taste (I used cracked black pepper)
cumin - ground or whole crushed (I added this - totally optional but i like it this way)
paprika for sprinkling on top and chopped parsley)

Instructions

  1. In a blender, chop the garlic. (I crushed mine with a pestle and mortar and added to the food procesor). Pour garbanzo beans into blender, reserving about a tablespoon for garnish ( i drained mine and rinsed a little). Place lemon juice, tahini, chopped garlic and salt in blender. Blend until creamy and well mixed. (I actually place in the food processor - tahini, lemon juice, chickpeas, salt, pepper, cumin seeds, water olive oil and garlic - blitz till smooth)
  2. Transfer the mixture to a medium serving bowl. Sprinkle with pepper (paprika in my case) and pour olive oil over the top. Garnish with reserved garbanzo beans.  


So there you have it...easy peasy one two three! Chuck everything in a food processor and blitz! Keep in the fridge in an airtight container so that it doesn't dry out.


I made the hummus to be eaten with carrot and celery sticks, tomato salsa and stuffed grilled chicken


Hummus Kacang Kuda
Sumber: All Recipes

Bahan-bahan:

2 bawang putih (saya tumbuk halus)
1 tin kacang kuda (resepi asal guna air dari tin itu sendiri tapi saya tak berapa gemar sebab rasanya nanti pahit sedikit)
kurang dari 1/2 cawan air (menggantikan cecair dari tin kacang kuda tu)
4 sudu besar jus limau (tambah sedikit demi sedikit ikut rasa)
2 sudu besar tahini (pes bijan)
1 sudu kecil garam (ikut rasa)
2 sudu besar minyak zaitun (saya guna lebih sikit)
lada hitam ikut rasa 
jintan putih - saya tambah sendiri (serbuk atau biji tak kisah)
paprika dan daun parsley sebagai hiasan

Cara-cara 
  1. dalam pengisar, masukkan semua bahan diatas. Kisar sampai sekata dan tak berketul dan agak berkrim. bagi yang tidak ada pengisar boleh la menggunakan lesung batu ye..hahha...boleh la lengan tu macam popeye :))
  2. keluarkan dan masukkan dalam mangkuk, hiaskan dengan minyak zaitun, paprika dan daun parsley. Boleh juga disimpan dalam bekas kedap udara dalam peti sejuk. boleh dihidangkan bersama roti arab, carrot, dan pelbagai sayuran. Juga boleh sisapu atas roti sebagai sanwich


Thursday 1 November 2012

Scones oh lovely scones..


This is my first attempt in making scones..and thank goodness I picked the right recipe! These scones turned out delicious...I think with practice it would turn out even better. This time around I went all the way and ate it with cream (I didn't have clotted cream...so whipped cream would have to do ^_^) homemade strawberry and raspberry compote. Next time I decide to make this again I would love to have it with butter and jam...oh yummm! 

After watching many cooking shows on how to make scones (rachel allen..youtube..tips from my sister ..etc) I gathered my courage to try this recipe. I was always afraid of over-working the dough...making it tough and having to throw the whole lot into the dustbin...mind u there were quite a few things i've cooked that had to be thrown away over the years...erk...lets not go there..haha

Anyway, have a go at it and practice makes perfect! And if your the only one eating them at home....then...pratice makes you FAT! Oh my..hahah..I'm definitely referring to me ..LOL


Ultimate Scones

Ingredients:

225g self-raising flour , preferably organic (i used just regular self-raising flour)
¼ tsp salt
50g slightly salted butter , chilled, cut in small pieces
25g golden caster sugar (i used castor sugar)
125ml buttermilk (i used milk and added a dash of lemon juice)
4 tbsp full-fat milk
a little extra flour for dusting
strawberry jam and clotted cream, to serve ( i used strawberry and raspberry compote and whipped cream)


Instructions
  1. Preheat the oven to 220C/gas 7/fan 200C and lightly butter a baking sheet (unless you're using a non-stick sheet). Tip the flour into a mixing bowl with the salt. Shoot in the butter, then rub together with your fingers to make a reasonably fine crumbed mixture, lifting to aerate the mixture as you go. Try not to overrub, as the mixture will be lighter if it's a little bit flaky. Now stir in the sugar.
  2. Measure the buttermilk, then mix in the milk to slacken it. Make a bit of a well in the middle of the flour mixture with a round-bladed knife, then pour in most of this buttermilk mixture, holding a little bit back in case it's not needed. Using the knife, gently work the mixture together until it forms a soft, almost sticky, dough. Work in any loose dry bits of mixture with the rest of the buttermilk. Don't overwork at this point or you will toughen the dough.
  3. Lift the ball of soft dough out of the bowl and put it on to a very lightly floured surface. Knead the mixture just 3-4 times to get rid of the cracks.
  4. Pat the dough gently with your hands to a thickness of no less than 2cm and no more than 2.5cm. Dip a 5.5cm round fluted cutter into a bowl of flour - this helps to stop the dough sticking to it, then cut out the scones by pushing down quickly and firmly on the cutter with the palm of your hand - don't twist it.You will hear the dough give a big sigh as the cutter goes in. Gather the trimmings lightly then pat and cut out a couple more scones.
  5. Place on the baking sheet and sift over a light dusting of flour or glaze if you wish. Bake for 10-12 minutes until risen and golden. Cool on a wire rack, uncovered if you prefer crisp tops, or covered loosely with a cloth for soft ones.
  6. Serve with strawberry jam and a generous mound of clotted cream (Cornish people put cream first, then jam, Devonians the other way round). Eat them as fresh as you can.

Wednesday 31 October 2012

Puff Pastry Apple Tart


I love apple tart! A while back, I bought Pampas Frozen Puff Pastry at Presto Citta Mall..and was wondering what to do with it...chicken pie? sausage rolls? chicken pot pie? some vol-au-vent with whipped cream and fresh berries? hmmm...many days have passed since the day I purchased the puff pastry...and somehow on Aidiladha I decided to bake this puff pastry apple tart. I had a can of applesauce in my cupboard waiting to be used and I decided this is the time to use it as well. This apple tart can be made in a jiffy but you need to let the frozen puff pastry thaw in advance so that it can be rolled out. Here is the recipe and give it a go..for this sized apple tart I only used 2 grany smith apples :)


Puff Pastry Apple Tart
Source: Martha Stewart

Ingredients:


  • 1 sheet frozen puff pastry (from a 17.3 ounce package), preferably Dufour, thawed (I used Pampas frozen puff pastry)
  • All-purpose flour, for surface
  • 1 large egg, lightly beaten, for egg wash
  • 1/2 cup fresh or good-quality applesauce
  • 3 Granny Smith apples, peeled, cored, and cut into thin wedges (I used 2)
  • 1 ounce (2 tablespoons) unsalted butter, melted
  • 2 tablespoons sanding sugar, for sprinkling
  • 2 tablespoons apricot preserves (I didn't use)
  • 1 tablespoon water
  • Confectioners' sugar, for dusting (optional)
  • Whipped cream, for serving (optional)

Directions

  1. Roll puff pastry into a 14-by-16-inch rectangle on a lightly floured surface. Cut a 1-inch-wide strip from each side of dough. Brush edges with egg wash, and top with cut strips to form a crust. Prick middle of dough all over with a fork, and transfer to a parchment-lined baking sheet. Refrigerate for 30 minutes.
  2. Preheat oven to 400 degrees. Spread applesauce onto middle of dough using an offset spatula. Arrange apple wedges over applesauce in 3 tightly overlapping rows. Brush apples with melted butter. Brush crust with egg wash, and sprinkle entire surface with sanding sugar. (Unbaked tart can be frozen for up to 3 days.)
  3. Bake until edges start to puff, about 20 minutes. Reduce heat to 375 degrees, and bake, rotating halfway through, until pastry is dark golden brown and apples have caramelized, 25 to 30 minutes more. Transfer sheet to a wire rack, and let cool for 10 minutes.
  4. Warm apricot preserves and water in a medium saucepan over medium heat. Brush apples with warm apricot preserves. Dust with confectioners' sugar if desired, and cut into squares using a pizza wheel or a knife. Serve warm with whipped cream if desired.

Yummy Homemade Granola Bars


I've never really liked the choice of granola bars available at the supermarkets...I think some are just too sweet and the combination of ingredients..hmm...some of it I like...some I don't like..and by the way...they can be very pricey! I like the ones that taste chewy and crisp at the same time..but some of the ones that come in packets are kinda soft and somehow the taste of packed oats that are not crisp..tends to taste a little pasty ..hmm..not really my thing I guess.To find the right granola bar for me is quite a task..so i gave up. Haven't had a granola bar for 5 years...hahha..but suddenly I came across a recipe on footnetwork.com by barefoot contessa and i decided to give it a whirl!

I did make some adjustments as I read the reviews and made a conclusion that it might be too sweet for my husband. He doesn't like things too sweet :) Anyways...me too! All I can say about this recipe is "thumbs up!". A great basic granola recipe that we all can work on and tweek to our own liking. You don't have to follow the recipe to the T....but if you like the ingredients in the original recipe, go ahead and give it a try. I think these will keep well in an airtight container for many many days (if they ever last that long).

Homemade Granola Bars (original recipe)
Source: Barefoot Contessa

Ingredients

  • 2 cups old-fashioned oatmeal
  • 1 cup sliced almonds
  • 1 cup shredded coconut, loosely packed
  • 1/2 cup toasted wheat germ
  • 3 tablespoons unsalted butter
  • 2/3 cup honey
  • 1/4 cup light brown sugar, lightly packed
  • 1 1/2 teaspoons pure vanilla extract
  • 1/4 teaspoon kosher salt
  • 1/2 cup chopped pitted dates
  • 1/2 cup chopped dried apricots 
  • 1/2 cup dried cranberries
  • Directions
Preheat the oven to 350 degrees F. Butter an 8 by 12-inch baking dish and line it with parchment paper.
Toss the oatmeal, almonds, and coconut together on a sheet pan and bake for 10 to 12 minutes, stirring occasionally, until lightly browned. Transfer the mixture to a large mixing bowl and stir in the wheat germ.
Reduce the oven temperature to 300 degrees F.
Place the butter, honey, brown sugar, vanilla, and salt in a small saucepan and bring to a boil over medium heat. Cook and stir for a minute, then pour over the toasted oatmeal mixture. Add the dates, apricots, and cranberries and stir well.
Pour the mixture into the prepared pan. Wet your fingers and lightly press the mixture evenly into the pan. Bake for 25 to 30 minutes, until light golden brown. Cool for at least 2 to 3 hours before cutting into squares. Serve at room temperature.


My Version of Homemade Granola Bars
(based on the above recipe but tweeked to my liking)


  • 1 cup old-fashioned oatmeal (toasted)
  • 1 cup (heaped) rice krispies
  • 1/2 cup toasted coconut flakes
  • 1/2 cup sliced almonds
  • 1/2 cup dessicated coconut (toasted)
  • 1/2 cup nestum/ cereal
  • 3 tablespoons butter
  • 1/3 cup honey
  • 1/3 cup corn syrup
  • 1/4 cup muscovado 
  • 1 1/2 teaspoons pure vanilla extract
  • 1/4 teaspoon salt
  • 1/4 cup sesame seed (toasted)
  • a handful of flaxseed (don't need to toast)
  • 1/2 cup (heaped) dried cranberries
  • a handful of cashewnuts (toasted)
  • a handful of walnuts (toasted)
  • Directions
Preheat the oven to 350 degrees F. Butter an 8 by 12-inch baking dish and line it with parchment paper.
Toss the oatmeal, almonds,cashewnuts,walnuts, sesame and coconut together on a sheet pan and bake for 10 to 12 minutes, stirring occasionally, until lightly browned. Transfer the mixture to a large mixing bowl and stir in the nestum/cereal.
Reduce the oven temperature to 300 degrees F.
Place the butter, honey, corn syrup, muscovado sugar, vanilla, and salt in a small saucepan and bring to a boil over medium heat. Cook and stir for a minute, then pour over the toasted oatmeal mixture. Add the falxseed, toasted coconut flakes and cranberries and stir well.
Pour the mixture into the prepared pan. Wet your fingers and lightly press the mixture evenly into the pan. Bake for 25 to 30 minutes, until light golden brown. Cool for at least 2 to 3 hours before cutting into squares. Serve at room temperature. (I baked it for 30 mins for a crispy crunchy granola bar...you can bake it for less if you want them more chewy)

optional ingredients:
chocolate chips, bittersweet choc chips, raisin, apricots, dates, dried apples, figs, hazelnuts, almond slivers, peanuts, pumpkin seeds, sunflower seeds, cornflakes, and oh sooooo many more!

Wednesday 5 September 2012

Peanut cookies / Biskut Kacang Mazola


Peanut cookies..hmm..what can i say? It's a household tradition to make these delectable cookies during Eid.  Well at least in my parents home it is. This year I made these late because honestly..I have never made them before..but I've tasted plenty..some delicious..some bland...some..errr...can't even be called cookies..hehehhe Anyway my mum makes the best ones... :)

For this particular peanut cookie recipe I'm about to share with you...well i stumbled upon it while searching for the best online recipe (and it seemed like it had the least amount of ingredients). I went through the comments the recipe received and I came to a conclusion..this is the ONE! huhuhu 

I also decided to experiment a bit with this recipe as i saw somebody commented that the cookies would taste different if you actually fried the peanuts without oil until browned as compared to the taste with just baking the peanuts in the oven...and also using the mortar and pestle (lesung batu) as compared to using a food processor. Well....guess what? I made two batches. One batch was made by frying the peanuts in a pan without oil and then bashing (crushing?..erk...the right word has yet to come to mind) using the mortar and pestle. Another batch was made by baking the peanuts till browned and then blitzing them in a food processor. Well well well.... the verdict...*drum roll please*.... the olden day method = pan frying without oil and crushing them in the mortar and pestle was wayyyyy worth the effort. The taste was like superb peanut buttery goodness! 

Anyway, let's get back on track. Here is the recipe and give it a go. For those worried about zits when eating peanuts..well..who cares! 1-2 zits wouldn't hurt..or your waistline...or.....ok ok enough already..the bad side over weighs the good..but have a go at it anyway because the cookies are sooo good. :)

Peanut Cookies / Biskut Kacang Mazola
Source: Arah

Ingredients:
200gm plain flour
200gm groundnuts/peanuts-fried without oil in a pan until golden brown
100 gm icing sugar
1 small bottle of mazola oil or any other corn oil
salt to taste
egg yolk for glazing
extra peanuts for decoration

Instructions:
  1. Pan fry the peanuts till golden brown, (some may want to bake it) and finely crush the cooled peanuts in a mortar and pestle (or you could blitz it up in a food processor or grinder).
  2. In a bowl, combine flour sugar salt and finely crushed peanuts.
  3. Add the mazola oil little by little to the dry ingredients and mix till it forms a soft pliable dough. (don't put in the whole bottle..just until it forms a dough ok )
  4. Scoop up the dough using a 1/2 tablespoon measuring spoon and roll to form a round cookie.
  5. Glaze the tops of the cookie and put 1/2 a peanut on top to decorate.
  6. Place in a preheated oven of 170 degrees Celsius until the glaze is golden brown. Usually it indicates that the cookie is done. 
  7. When golden brown remove from the oven and place on the rack to cool. Once cooled put some into our mouth..nyumm nyumm nyumm..enjoy it and put the remainder of the cookies into airtight container. hahahha
they may not look too pretty but they sure do taste good!

in an airtight container..er...never full to the top because of the cookie monster (ME!!)


Tuesday 4 September 2012

Pineapple Tarts My Fav!!!

This is my fav recipe to date! I made these pineapple tarts last year using this recipe and I am still using this recipe this year. I think this recipe has a full round flavour to it..and its best to use a good quality butter..nothing compares! Anyway, I've tried other recipes...they do taste good but I end up going back to this same recipe...so I hope you give it a try. Might be tricky at first because pressing the dough out takes patience but once you have gone over that hurdle then...its easy peasy lemon squeasy! Nobody ever said that making pineapple tarts are easy...it took me 2 hours standing up making one batch (erkk..or maybe I'm just slow) but the taste I tell ya......it's worth every bite! Here's the recipe!

Tart Nenas Gebu / Pineapple Tarts

Ingredients:
2 1/2 cups flour
2 tbsp corn flour
2 1/2 tbsp custard flour (u can substitute for cornflour)
2 tbsp milk powder
1 cup salted butter (226 gm) (erk..i just dump the whole 250g butter bar in :p)
1 tbsp ghee
1 egg yolk
1 tsp vanilla essence
1 tbsp sugar (i put in 1/2 tbsp sugar...i don't like my pastry sweet :p)
a pinch of salt
store bought pineapple tart filling made into balls (for lazy people like me..or you could always google a recipe for a good homemade pineapple tart filling recipe)
egg wash for gazing the tops

Instructions:
  1. Place softened butter, ghee, milk powder, salt and sugar in your mixing bowl. Using a paddle attachment, beat these ingredients on medium speed until fluffy.
  2. Add the yolk and vanilla essence and continue beating.
  3. Add the flour to the mixture spoonful at a time till all is incorporated.
  4. Prepare a clean work surface for pressing the mixture through the mould. 
  5. Press the mixture on to the work surface with the jagged side down facing.
  6. Place the pineapple tart filling balls on to the pressed pastry and roll.
  7. Place into a small paper cases and brush a little eggwash for the tops before placing in the preheated oven (170 degrees Celsius) for 15 mins. but to me the determining factor that determines my tarts are done is when the egg wash is nice and golden brown. 
  8. Remove from the oven and leave to cool on racks. It takes time to cool as the pineapple filling remain hot for quiet a while. Make sure to store the fully cooled tarts in airtight containers.

Store bought pineapple tart fillings rolled into balls
pastry pressed out with the smooth side upwards and jagged side down facing
place filling on the pastry
roll pastry with filling inside
cut the end
place into small paper cases
brush on some egg wash and place into the oven.
ready! leave to cool before tasting as the filling can be super HOT!
These are the ones i did last year!


Wednesday 6 June 2012

Easiest Most Delicious Kek Batik!


Kek batik is one of my favourite desserts ever. All this while I've been buying this cake not knowing that it is toooo..and I mean toooo easy to prepare! It's so easy you don't even need an oven...and to my surprise..this recipe uses so little ingredients..and the ingredients too are easy to find. I have tried other recipes that use eggs...but after trying many recipes..with and without eggs...I've decided to keep to just this recipe...unless another great recipe is found. But overall I think this recipe provides a perfect overall taste of sweet.. salty.. chocolatey.. crunchy.. chewy... GOODNESS! hahha. 

From my own experience..the egg based chocolate batter makes the biscuit go softer faster. As for this recipe..it keeps the biscuit crunchy for days! (if it even last a day or two...its really addictive..I have to warn you ..haha). My kids love it..adults love it...once you have had a slice, I'm sure you would want more. Oh yes, one more tip for you readers, I've done some research and I personally feel that the choice of biscuit used is truly important. I have used other brands but I always end up buying LEE brand Marie biscuits. It doesn't become soggy and the crunch factor is very important.

In preparing this kek batik, you could either dump all biscuits(broken into smaller pieces in advance) into the chocolate batter...or you could layer it one by one as I have done. But honestly, I prefer dumping everything and pressing it down..being the busy mom I am (excuses excuses...) or it could be the laziness in me. This has only been my first try at layering the biscuits, but I have made this kek batik many times before by dumping everything into the pot. This recipe does not call for any coffee but there are times when I feel the urge to eat something chocolatey...something with coffee...mocha as we call it...then I will put some coffee into the chocolate mixture. I think that you can even put it in roasted nuts if you like. I've even seen some people put in different types of biscuits and even malteasers! Yummm! Give it a try, you will love it I promise.


Kek Batik
Source: Hasue and Milla

Ingredients:
200g milo
250g butter (I used salted butter for the sweet salty taste..you could use the unsalted one if you like)
3 tbsp cocoa powder
1/2 a can of condensed milk (or less)
1 packet of marie biscuits (use less or more..depends on how you like it..I usually use 3/4 of a 300g packet)
1-2 teaspoon instant coffee granules (optional)

Instructions: 
  1. Line a baking tin with high sides with parchment paper or you could use foil or cling wrap. I prefer to use parchment paper for a smooth finish on the sides and bottom of the cake. 
  2. Melt the block of butter in a pan over low heat. (I used a wok for easy stirring when I add the biscuits)
  3. Add in the milo, cocoa powder, coffee and stir really fast.
  4. Add in the condensed milk as you go along and stir till the mixture is smooth and no more lumps are visible. I used a whisk.
  5. At this stage you could either add all your broken pieces of biscuits into the milo mixture or you could layer the biscuits. If you are putting your broken biscuits into the milo mixture, make sure you mix well till all the biscuits are covered. I used two large wooden spoons. It makes it easier and faster.
  6. Place the mixed biscuits and milo mixture into the prepared pan. If you are planning to dump everything in to the prepared pan, get another piece of parchment paper and press everything down till you have and evenly square cake.
  7. Leave to cool and place in the fridge for 1 hour or better overnight. 
  8. Cut into slices and serve cold. You can keep the remainder of the cake in the fridge for up to a week but I doubt you would still have any left by the weeks end :). Yummy too with a glass of cold milk.


Tuesday 29 May 2012

Fried Noodles - Mums way is the winner!

Fried noodles with prawns

Ever since I could remember...my mum would cook fried noodles. She would put different main ingredients in them but the best one to me would be thinly sliced beef..ohhhhhhhhhh..I'm drooling already. Ok enough of that..haha. Anyway, I've followed through her footsteps and started cooking fried noodles for my kids ever since they were 4 years old (when I say this..I suddenly feel so old when in fact my eldest is only 5 years old!..haha). I have adjusted the level of heat from the blended chilli to my kids tolerable level :) By the way, I only use home blended chilli as I believe that the ones sold in shops use too much coloring and preservatives. I also usually blend my dried chilli that has been cut and boiled, with onions and garlic for more flavour. Try this out ok readers..its a sure winner in my home and I hope it will be a winner in yours too.

the ingredients
mee kuning that has been rinsed under running tap water
sweet soy sauce and tomato sauce


Fried Noodles Jamilah (my mum)
Source: Jamilah

Ingredients:
1 packet yellow egg noodles - mee kuning
5-6 prawns cleaned (more if you like)
carrots - julienned
2 medium tomatoes - diced
1 stalk spring onion or a few stalks chives
1 tablespoon or less of blended chilli
1/2 a small onion cut into wedges
1 large clove of garlic
1 teaspoon of ikan bilis stock
1 1/2 tablespoon of tomato sauce
3 tablespoon of sweet soy sauce
2 tablespoon oil for cooking
*i didnt add any salt or sugar as the noodles are already flavourful and I get the salty taste from the tomato and soy sauce as well as ikan bilis stock.

Instructions:

  1. Heat oil in a wok. Add in the blended chilli paste and onion and garlic. Fry till fragrant. (take a little bit of time so that the blended chilli is not too spicy)
  2. Add in the diced tomato. Fry till the tomatoes become mushy and soft. This stage takes time..but its very well worth the wait as it adds a lot of flavour.
  3. Add the prawns, carrots,  ikan bilis stock, tomato sauce and sweet soy sauce. Stir to mix well and leave to cook for 1 minute.
  4. Add in the rinsed noodles and spring onion. fry till the noodles are fully cooked and absorb some of the sauce. I prefer to fry the noodles at a higher heat. I have no idea why but it somehow tastes better :)
  5. Ready to serve! Serve hot with some freshly cut spring onion on top. Enjoy!

Fried Noodles with beef..my favourite version!

Friday 11 May 2012

Delicious Tuna Mayo Buns/Roll

Tuna Mayo buns

Tuna and mayo is one of my favourite combinations. Add a little bit of diced onion, a pinch of salt and sugar, lime or lemon juice..diced tomatoes..yummm! Spread on toast and I'm in heaven! When made into a bun or roll it's even better! Melted cheese on top...and swirl extra mayo...ok ok..enough said. It's a favourite recipe which I stumbled upon in Che Mat's Blog..Dapur Tanpa Sempadan. I fell in love with his blog ever since I stumbled upon it and I've never looked back. Visiting his blog is part of my daily ordeal. A MUST. Just look at his food presentations, the fool proof recipes, the gorgeous bowls and plates..and not forgetting his beloved TEAPOTS! Ye tak Che Mat???hehe..

Anyway, his blog is very informative, and the link above actually shows a step by step to make these lovely buns. I did make some changes to the recipe, but I stay true to the bun recipe as its very crucial to get light airy cottony soft buns. I make these buns a few times a month, and even sell some upon order. So far only praises for these buns by my friends who have tasted them. 

So far, I've tried various canned tuna's...some in water, some in oil, some in chunks and some shredded or flaked. I would suggest you get the ones that are not already in mayonnaise as I prefer to add just enough mayonnaise of my choice to the tuna flakes. We all have our favourite mayonnaise right? Besides that, I prefer to use tuna flakes so as not to get bits that are too chunky when I roll the buns..and it makes it easier to spread too. Ok, now for the recipe...and readers...this recipe is a keeper. Even better than the ones sold in bakeries....well to me at least :)

Tuna Cheese Roll / or as I call it..Tuna Mayo buns
Source: Mat Gebu

Ingredients:
250g bread flour (high protein flour)
50g castor sugar
1/2 teaspoon salt
10g powdered milk 
1/4 teaspoon bread improver
1/4 teaspoon bread softener
30g egg (crack 1 egg, stir a bit and weigh the correct amount needed - the remainder can be used as an egg wash for the tops of the buns before baking)
6g instant yeast
20g butter
125ml warm water (if you are going to use a breadmaker, just use normal filtered tap water)

Ingredients for the tuna mayo:
1 tablespoon butter melted
1 tin tuna, discard all liquid and fork through the big pieces
2 1/2 tablespoon mayonnaise
1 onion diced (I used 1/2)
1 spring onion / chives ( I used fresh minced parsley, dried versions too are ok)..save some for the topping
1 limau kasturi ( I used lime juice or lemon juice - just enough to the taste)
1/2 teaspoon cracked black pepper
salt and sugar ( I added a little bit of sugar to give it an all round flavour) 
Just enough shredded cheddar cheese
* I added 1 medium tomato diced and sometimes I add finely chopped red chilli pepper

Instructions:
For the Dough: Put the yeast into the warm water and leave aside till it bubbles. Put all the other ingredients together except the butter. Add the yeast mixture and mix evenly till it forms a dough. Add the butter and knead the dough till elastic and firm (just around 20 mins). Make sure the dough is gathered around the side into a round ball, and place in a bowl and wrap with plastic cling wrap. Leave for 45 mins until risen.
Other Methods: (MY ONLY METHOD I FOLLOW) only because I'm lazy..haha
Combine all ingredients above in a breadmaker, choose the setting "dough" and press the "on" button. Wait till finished (my panasonic breadmaker sets the time for dough around 2 hours 20 mins).. follow your own breadmaker setting for dough.

Tuna Roll Instructions:Combine all the ingredients for the tuna filling except for the melted butter. Stir to combine and set aside. Take out the proofed dough, punch down the dough to remove the air, dust some flour on the bottom and top of the dough and roll flat till you get a square shaped flat dough. Brush melted butter all the square shaped rolled out dough. Spread the tuna filling evenly..but leave some space at the ends of the dough. Roll the dough as you would a swissroll and pull it tightly. Cut into 10 pieces. placed the cut rolls into paper cups that are of 4 inch diameters...enough space for the dough to rise further. Leave to rise for another 45 mins. When it has fully risen, brush the remaining egg wash on the tops, sprinkle the extra chopped parsley and shredded cheese and black pepper. Bake in the a preheated oven of 190C for 25 minutes. (from my experience, it took only 14 mins for me until the tops are a lovely rich golden brown). If you are not too sure about the timing, best best to take out the buns are when the tops are golden brown. Place on cooling racks after removing from the oven

 
Tuna Mayo buns in cupcake cases fresh from the oven

Tuna mayo buns in bun cases..more room to rise


I decorated mine with a squeeze of chilli sauce and extra mayo..sooo good!

Easy Peasy Basil Rice Porridge - Bubur Selasih

Basil Rice Porridge - Bubur Selasih with fresh local basil and fried fish..yumms!

Don't you just love the smell of basil. It's so refreshing. Every time I go out into my 'garden-in-the-sky' (I live in an apartment..hence the word sky appears..haha), I will pick a basil leaf and tear it and take a whiff....just wonderful! So far, I have 3 types of basil plants in my garden. Italian basil, Lemon basil and the local basil known as 'daun selasih'. The biggest leaves are definitely from the lemon basil plant..smallest being the local ones...but ALL very very fragrant. As I have learnt from the lady at the herb nursery, the local basils need plenty of water and sunshine as for the Italian and lemon basil, need not be watered too much and indirect sunlight or partial sunlight is sufficient. I'm pretty much new at gardening, feel free to correct me if I'm wrong as I go along..haha. 

on the left is our local basil known as daun selasih and on the right is lemon basil

Anyway, as for the basil porridge..it's something I think I first saw my aunty make. My mother makes the same too. But there are many variations to this recipe and you don't have to stick to the same old recipe. Be creative, use up what ever is in the refrigerator or freezer, make it to suit your baby and make it to suit adults. I find my mother put in dory fillets in hers and it tastes wonderful! As for me, I didn't have any dory so I either put in prawns with their shells (for better flavor), or plain as it is and eaten with pan fried fish or chicken fillets. By the way, my 1 year 5 month old (young..hahha) baby loves this! Every time I make this porridge, I don't have to chase him around the house to get him to eat. He was more than willing to sit quietly on my lap as he ate this wonderful..(or magical...hahha..works wonders on his attention span) porridge. In my opinion, put in more vegetables if your baby loves carrots and peas and even diced potatoes. You can even put spinach in it too. As for the basic version..I like to keep it simple for newbies and you can add as you like. Here is the recipe and have a go at it!

Basil Rice Porridge - Bubur Selasih
serves 1-2 persons

Ingredients:
1/2 - 1 cup uncooked rice
2 cups filtered water or more. Depending on how thick you want your porridge.
1 handful or basil leaves - left whole or chiffonade(fancy terms!haha)
2 thin slices ginger (can be grated or cut into matchsticks but I couldn't be bothered, slices are easier to remove before serving the porridge for babies)
1-2 cloves garlic (I like mine whole or cracked..not sliced or easy removal..you could do otherwise)
1 medium onion (whole for me..hahha..reasons as above..or you can thinly slice it)
1-2 tablespoons of fish sauce *optional
1 dash of white pepper
salt
*optional: add diced carrots, peas, spinach, corn, prawns, chicken fillets, dory or other boneless white fish fillets, tuna

Instructions:
  1. Wash uncooked rice under running water
  2. Put the clean rice in a pot on the stove over medium fire, add the water, garlic, ginger and onion and leave to cook. At this stage you can add your diced carrots too)
  3. As the porridge becomes thicker and the rice has lost some shape (no longer the shape of individual grains of rice), add in the basil leaves, fish sauce, salt and pepper. You can also add in your chicken fillets, boneless fish fillets or prawns too. I don't like to add in earlier as it takes time to cook the rice. If you put it in too early the prawns will lose their juiciness and the fish or chicken will dry out.
  4. Leave to cook until the fish/prawns/chicken is cooked.
  5. All done..?? yes..all done...haha. Serve warm with pan fried fish or chicken if plain or serve as it is if you have cooked it with the chicken/fish or prawns. Top of with fresh basil leaves. Ohhh..and meat or chicken floss on top would be great too..yummmmy on a cold rainy day.
Is that banana fritters on the side there? hmm..I'm feeling hungry already.